Wednesday, January 30, 2013

Better late then never... Here are some of my FAVORITE pictures from my trip to Norway

 
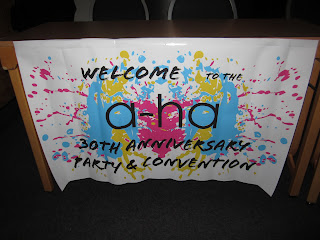
Finally getting around to posting pictures from my last trip to Norway (September 2012).  Before you ask... Yes... I was there for another concert or two to see Morten Harket - the lead singer of A-Ha :)  I was planning on going in May of 2013 but moved up my trip when I heard Morten was doing a solo concert in Oslo, Norway.  This concert was extra special, it not only was A-Ha's 30th Anniversary but Morten was doing a special concert on his Birthday - September 14th. 
 
 
I traveled back to Noway for 2 weeks.  The begining of my trip was spent traveling then the middle of my trip was spent with LOTS of fans of A-Ha/Morten Harket.  I eneded my trip with LOTS more traveling and site seeing.  Oslo is amazing, so much to see and do and not enough time to do it all!!!  If you ever get the chance to go to Norway, go!  I am going again in July of 2014 with my family and I can't wait to show them the city!  Enjoy the pictuers I posted, they are some of my favorite.
 

 First in line - queue for Morten's Birthday concert :)
 
 Here I am with the Dan Sundhordvik - Lead Guitar
 The long queue...
 A book by Stian Andersen and his work on "a-ha" boy was it heavy!  Glad I only had to copies to bring back to the USA!
 The one and only Morten Harket :)


 Hard Rock Cafe in Oslo

 My shadowside off the Kon Tiki
 The Fram
 Hollmenkollen - Ski jump (a must if you visit)


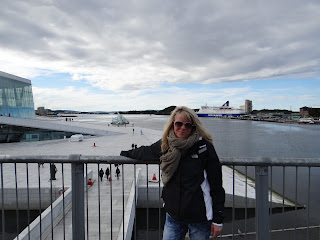
 National Oprah house (another must with every visit)


Hope you enjoy the pictuers... will update my blog with some Valentine cards/projects this week!
 
Photobucket

Thursday, October 18, 2012

Happy Halloween ~ BOO

Had a FANTATIC time in Norway!!!  Will upload pictures soon, but please visit my FB page if you want to see what I have been up too the last two years :)  Here are two cards I created using some NEW paper by K&Company.  Not much stamping here but I did have fun using my dies and punches.  Enjoy your weekend & thanks for stopping by!
 
 
Happy Halloween - Giant Cupcake
Supplies - K&Company paper, Cupcake Die, MS Bat Punch, SU Stamp and punches, Twine
 
 
Close-up - Layers were all popped up
 
 
Scary Halloween 2012
Supplies - Sizzix Dies and Martha Stewart Punches, SU Sentiment and Punches
 

 Here is a close up... Mummy was punched out and thin strips of gauze was wrapped around it.  The coffin as well as the other layers were all popped out using SU dimensionals. 

Photobucket

Thursday, July 5, 2012


Just a quick post and update! I am still here... Crafting has been put aside because of my travels. My next adventure is Norway this September. Will update my Blog soon with pictures be sure to stop on by for my weekly, montly or yearly updates! xxx

Photobucket

Monday, March 19, 2012

Easter Project - Box in a Bag

Happy Tuesday...  Just a quick post for a quick project.  Today's challenge over at SCS is a Box in a Bag  ...  So I quickly put this together using some extra scraps on the stamp table.  I will be filling my project with pencils for my daughters classroom.

I hope you were inspired by today's project, stop on over to SCS to learn how to make this project and see the other fun samples.

Supplies: SU Cardstock: so Saffron, certainly celery, crumb cake, white, punches: Martha Stewart grass & bunny border punch, SU tab punch & misc circle punches along with ribbon.

Enjoy your day!
Photobucket

Monday, March 12, 2012

More Easter Cards and Today's Winner...

 Happy Monday... Thanks for stopping by and visiting my Blog!  Here are two more cards that I created using another adorable image from Stamps and Smiles.  These two samples were created using the image and some extra scraps - quick and easy.  To highlight the card, I sponged on some white ink which helps the layers pop.


Here is another sample I created using more scraps from my bin... A quick and easy card, just highlighting the image and DSP.  All of the images were colored using my Copics.  The grass was created by using my Martha Stewart craft punch.  By the close-up below, you can see I sponged on some white craft ink to help make the whole card pop.

Before I go, I would like to announce the winner for the Easter Card/Twine giveaway...  I would also like to thank all those that stop by daily and leave comments, it really means a lot!  So with that being said, today's winner is  Cathy... Please email me your address so I can get your goodies out to you.
Photobucket

Saturday, March 10, 2012

Easter Project and Giveaway


Thanks for stopping by this Saturday morning... I have had several emails/requests on how I created these adorable chicks for my cards/projects this past week, so with that being said... I will include the details on this Blog post.

For the egg, I used my oval Nestablilites.  After the oval was cut out, I ran it thru one of my favorite embossing folders by Quickutz called Polka Dots.  I then used a pair of my pinking scissors and cut thru the center of the oval. 

For the baby chicks, I used the following punches.  Head (SU 1 1/4 Circle Punch)  Body (SU 1 3/8 Punch) Hands (SU Small Heart Punch) and Chick Hair (Martha Steward grass punch - left over scraps)

***My chicks on today's card/project were created with the following supplies:  Pail - Archivers, Cardstock - SU Crumb Cake, Almost Amethyst, Bashful Blue, Certainly Celery, Barely Banana, Pretty in Pink and Pumpkin Pie.  Border Punches - Marth Stewart Grass and Bunny (both punches are hard to find) **The chicks nose can be created using a corner of any square or star punch.  For the eyes, I used my Close to Cocoa marker. *All shapes were sponged using the corresponding ink to make it pop.


Before I go, I also wanted to share a quick card I created for a friend of mine.  Quite a simple card to mass produce and looks quite fancy with all of the layers & embossing...

Please leave a comment, one lucky winner will receive one of my Easter cards and some twine.  The winner will be announced on Monday, March 12th.  Enjoy your weekend!

Monday, March 5, 2012

Easter Cards and Project


Happy Monday!  This whole week, I will be posting a NEW Easter card and/or project.  I start today off with another fun project and card.  While this looks like a card here, its acturally a 4 drawer box and I just designed the top portion of it. 


For full directions on how to create this box, please follow this link here.  For extra fun, I also created a card.  As of today, both the card and project are on their way to Norway.  God Paske - means Happy Easter in Norwegian).


The bunny image was printed out and colored in using my Copics.  For extra fun, I added some glitter and ribbon. 

Thanks for stopping by... Enjoy your week and don't forget to stop back soon, I will have more Easter cards/projects to share as well as a fun giveaway.

Photobucket

Friday, March 2, 2012

Easter Cards and Project


Happy Friday!  I would like to share a few cards and projects I have been working on for Easter.  I will be uploading more during this coming week as well as another fun giveaway.  For my first project, I created a basket using and 8.5 x 8.5 piece of brown cardstock.  Then I scored it at 2.5 on all sides.  I added the handle and then created the bunny from a digi image by Stamps and Smiles. 


Using some extra scraps, I then created a matching card.  The grass was created using an older border punch by Martha Stewart.  The bunny was printed out and colored in using my Copics.  To finish the card off, I added some extra Easter eggs, glitter and some twine.  Enjoy the close-up below. 


Please stop back soon as I will be uploading more cards and projects over the next week or so.  I will also have a giveaway.  Enjoy your weekend!
Photobucket